The post How I got 601 Shipments in Viking Outpost – TIPS appeared first on DolyGames.
]]>First, I share the pictures (proof) of my achievement.
The victory window I got: “The island of Rum has been picked clean of resources and the Outpost there has now been abandoned (aww, I’m gonna miss my hard work :P). Lord DGCOSMOS (that’s me! 🙂 ) has earned the title of Pathfinder.
(click on pictures to enlarge)

Next is the Leaderboard showing that I achieved the top rank among all those players who participated in this event.

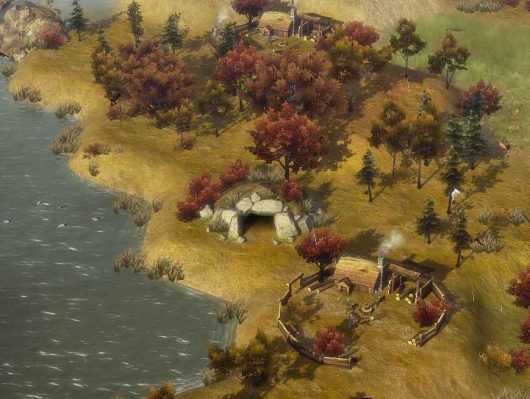
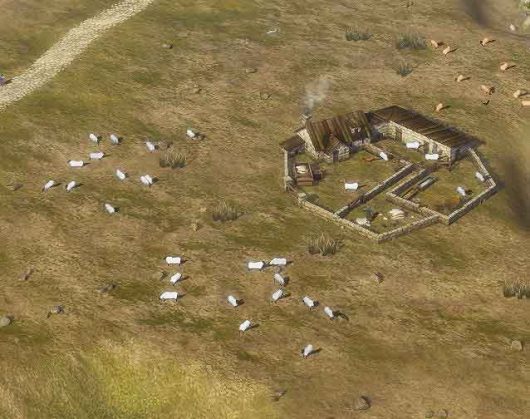
Viking Outpost Tips / Discussion
Alright, let’s start with the tips and/or discussion for the Total War Battles: Kingdom Viking Outpost. In no particular order:
Starting Resources
Be careful with your starting resources. Spend them wisely and you will grow very powerfully. But if you start wasting them right and left your growth will be damaged significantly.
This means for example don’t start putting a ton of Dams because they cost 20 silver and wood (wood you have but the silver you do not!).
When you start, do nothing but look and think how you are going to build as efficiently as possible.
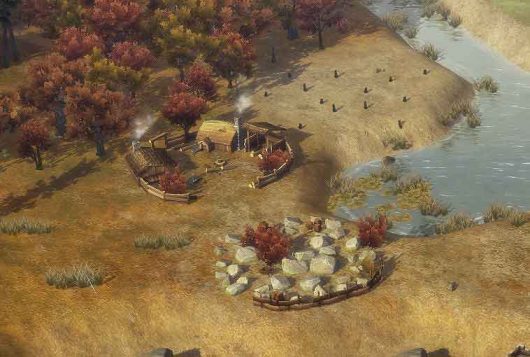
Chopping Trees
Don’t just start cutting down all trees! You will not only quickly reach your wood maximum of 4000 but you significantly damage your forests.
You need to select which trees to cut and allow the others to propagate more trees.
In generally you want to chop down first those trees which are blocking your way, or are right next to water (so new ones will grow fast) or take out the Pines allowing the oak trees to propagate.
Don’t take more than you need to and make sure you never reach your maximum 4000 wood limit!
One method for this is to upgrade the level 1 Blacksmith to level 2 using stone and wood which you have (silver you do not) and the only reason for this upgrade is to find a place to spend the wood (the fact that it will give you more silver is actually secondary!). This will reduce your wood by 400 (as shown on the picture below).

Furthemore, use the Master for one of the Woodcutters that you have which gives you 25% chance to get silver instead of wood. Assign this Master to the one which will be chopping the most amount of trees. Then UN-assign before you go to sleep so that you can put it on another Woodcutter on the next day.
Silver and Food
Think about getting silver and food when you start. Wood is aplenty at the beginning (but is the most needed resources at the end) and Stone is gotten quite easily via several Quarries.
The food will start coming in once you get some Farms going.
Silver will be the most difficult at the beginning as only Blacksmiths produce it and you need to man them first before they work.
Re-Prospect
As you need silver more than stone, keep on re-prospecting with your Quarries (assuming you fixed your food income) to find a silver mine. The chance is low to find one so you have to prospect a lot (in average). Finding a silver mine is like getting a free working Blacksmith!
Use the Quarry Master to increase your chances by 50%.

Upgrading Quarry to level 2
This is also why upgrading your Quarry is one of your primary goals. Because a level 2 Quarry will be able to mine 20 silver (and 20 stone) which is like a level 2 Blacksmith + 2 x Level 1 Quarries combined.
Using Slums
Often players don’t think about slums since they have no chance to produce Craftsmen. However, depending on where your Castle is located in your specific Viking Outpost (they are randomly generated each time), it might be interesting to consider building Slums because they only require food – no silver is used!
They will help you populate the Blacksmiths to start generating silver income and with enough Peasants (10) you can even manually convert into Craftsmen.
However, remember that this is just a startup action and as you progress you will most likely need to demolish the Slums and replace them with Houses.
The Farm Master
The Farm has a Master which one of the buildings can use which makes all the land around the Farm “fertile” allowing for the crops to be planted. This sounds great when you first hear it but there is a disadvantage to it.
You see, the crops which are planted right next to the river (any water) grow twice as fast than the “inner” crops. And this Master’s crops grow the slowest all around. So I only recommend using him when there is no other way.
I generally try to bring a river to produce wheat at the fastest rate possible so I will only use him as a last resort when the geography does not allow it.

Trees need water too
The forest looks a bit misleading making you think that if you chop a tree somewhere in the middle it will grow back. In fact, in order for new trees to grow the soil has to be “fertile” which you can see by the water droplet icon in the tile info. So when thinking about wood income you must consider:
- To cut down trees which are by the water and not those which are standing on non-fertile soil.
- Terraform your geography to direct rivers accordingly for both your Farms and Woodcutters.
Houses or Mansions?
When thinking about building Houses or Mansions the answer is very simple:
- If you are very active Houses are better.
- If you are less active or sleeping over night Mansions are better.
- Mansions are also better at producing Craftsmen.
You can also have a mix, but for the best performance you must be active which leans towards Houses.
The Blacksmith Trick
There is a trick with the Blacksmith which gives a one time small-medium advantage, which I don’t know if it is a bug or works as intended.
If you man a level 1 Blacksmith with the required 1 Craftsman and 4 Peasants and upgrade it to Level 2 (which requires 2 Craftsmen and 3 Peasants) the 1st Peasant will automatically become a full health Craftsman! This is a very nice boost in the beginning of the Viking Outpost.
More Castles
If your map allows it or if you can make more space to build more Castles this will greatly help in 2 regards:
- The main reason is actually getting more Markets. Because if you manage to build up to 10 Markets and man them with Craftsmen then you will be able to exchange goods at the very nice rate of 70%.
- The secondary reason is to build more Blacksmiths for silver income, but this pales in comparison to the Markets.

Using Markets
Using the Market is absolutely critical for ranking high in Viking Outpost in Total War Battles: Kingdom! However, using just 1 Market is ineffective because you get only a 30% exchange for your goods. So you must set a goal to build up as many markets as possible and man them ideally with Craftsmen (maximum is 10 Markets).
There are some exceptions where you may be forced to use only 1 Market to convert your initial wood to silver for example, but do your best to avoid it as this rate is very bad.
There is another speedup which can be seen as an exchange whereby you speedup a level 2 Blacksmith with 50 food to get 20 silver. This is 40% which is better than the Market rate, however note that you are also reducing the life of the workers and therefore I find this also ineffective.
Each additional market will give you +2% and each market manned by Craftsmen will give you +2% so 10 Markets = 10 x 2 = 20% moving the 30% to 50% and if you man them all with Craftsmen that’s another 10 x 2% which brings is to the maximum possible level of 70% (screenshot i posted above).
Getting to the 70% is very difficult! But try to make some way in that direction before you start exchanging resources.
What is the point of Gold in Viking Outpost?
I have seen a lot of players ask what is the point of getting 30 gold when you start Viking Outpost or getting Tombs / Gold Mines during it when there is absolutely nothing you can do with gold there.
Well, there is only one place you can spend the gold, but this one place is very significant. Once you gather 5 additional Gold you will have 35 and with that you can change the season!
This allows you to completely skip the Winter season or go back to Spring where the tree and crop growth is very fast!
Can anyone win in Viking Outpost?
Yes and no.
Everyone has the ability to win, but not everyone will put the time and effort to think smart and actively collect resources when they are ready and invest correctly/smartly prioritizing important goals.
Since growth is somewhat exponential a small mistake in the beginning becomes a massive mistake (or slower growth) down the road. So being very active and making the right decisions is very important for the 1st day.
The 2nd and 3rd days are spend on growing from the investments created during the previous day.
And the last days are the least interesting as your only job is to collect the incomes and send shipments.
So to summarize:
- Everyone can win theoretically.
- Making smart decisions is VERY important.
- Being very active is VERY important.
- (and it also depends if you are competing against strong players or medium players).
Last Words
I hope you enjoyed my big article / tips on the Viking Outpost in Total War Battles: Kingdom! I spent a lot of effort to make it nice and useful for you. If you liked it please like/share it and if you have additional tips or feedback then you are welcome to post it in the comment section below.
The post How I got 601 Shipments in Viking Outpost – TIPS appeared first on DolyGames.
]]>The post Best way to earn Gold in Total War Battles: Kingdom appeared first on DolyGames.
]]>I give an explanation / summary for each building / “business” type and a judgement score from zero to 10 points regarding its ability to generate gold (or at least crafting materials), followed by an overall conclusion at the end. Note: the judgement score is relative among the different possibilities.
Quarry
Quarry: good “normal” resource income (mainly stone, sometimes silver or crafting materials), but little or no gold.
You basically have a very low chance of finding a Gold Deposit which will have 1, 2 or 3 gold. After playing 200+ hours I cannot say that I got even 1 piece of gold per day from Quarries and I have a lot of them.
Judgement: Score 6/10
(estimated avg. 0-1 gold per day)

Pictures: leader Matthew for +50% prospecting chance:

Woodcutters
Woodcutters: very slow “normal” resource income (felling trees for wood), but they have a decent chance of a random event giving more income:
- Finding deer: a large amount of food (double if you have assigned the leader Alberto to one of your Castles)
- Finding dead wood: fast gathering of a good amount of wood.
- Finding Boulders: fast gathering of a good amount of stone.
- Finding a Tomb: exploring it either gives you 1 or 2 gold or kills some of your workers.
And you can also Track Beasts which has a chance to give you 30 honor (boars), 3 crafting materials (bears).
The problem with woodcutters is that in the winter season trees don’t grow. In other seasons trees can grow fast or slow.
Judgement: Score 10/10
(estimated avg. 0-5 gold per day)
Pictures: earning gold via Tomb

Image: Woodcutter and Tomb:
Pictures: Boulders
Pictures: leader Alberto for +100% deer hunting income:

Hunting Boars
Just an example picture from “Track Beasts”:
Farm
Farm: only grows wheat. A good source of “normal” resource income (food). There are no random events related to the farm and there is no way to earn gold or crafting materials from it.
The problem with farms is that in the winter season wheat does not grow. In other seasons it can grow fast or slow.
Judgement: Score 0/10
(avg. 0 gold per day)
Road
Road: although not technically a building or an income generating “business”, the road creates a chance for merchants to appear by its side. Once the merchants appear you can collect them rather quickly and gain a good amount of silver.
However, based on my experience they don’t appear frequently enough to worry about this.
Judgement: Score 0/10
(0 gold per day)
Sheep Farm
Sheep Farm: easily placed anywhere on the map, it allows shearing sheep for crafting materials. However, there is no way to earn gold from it.
Judgement: Score 3/10
(0 gold per day)
Cattle Farm
Cattle Farm: similar to the sheep farm but with cows and a requirement to be connected by a road. Furthermore, it allows you to only purchase as many cows as you have markets (maximum 10), which is limited.
For all these limitations it does give double the amount of crafting materials compared to sheep or a 15% chance to get 3 pieces of gold.
Mostly it is recommended to take the crafting materials because they are 100% guaranteed while trying to get gold might result in you gaining only some honor.
However, for the purpose of this article, if you manage your cattle/grass well and sell 10 cows per day then you can expect at least 1 of those sales to result in the 3 gold, which we can consider an average daily income of 3 gold (or 60 crafting materials).
Judgement: Score 10/10
(estimated avg. 3 gold per day)

Harbor
Harbor: it has the ability to be a good source of “normal” resources, but unfortunately too few fish show up making Harbors not efficient. They normally produce food but can also produce silver if Captain Jack is assigned. And, like Farms and Woodcutters, the Harbor does not work in the winter season.
However, there is no way to get gold from them.
Judgement: Score 0/10
(0 gold per day)

Tavern
Finally I won’t bring up town buildings here since we build them in any case and there is no “choice” as with the income generating structures above. But the Tavern in the town can have up to a 10% chance to giving 1 piece of gold, but this is both too rare an occurrence and too little gold to pay attention to (not even 1 gold per day in average).
(estimated avg. 0-1 gold per day)
Conclusion: How to earn gold in Total War Battles: Kingdom
Summary of scores:
- Quarry: 6/10
- Woodcutters 10/10
- Farm: 0/10
- Road: 0/10
- Sheep Farm: 3/10
- Cattle Farm: 10/10
- Harbor: 0/10
So to conclude, if a player is thinking about gold income / earning gold, then:
- Do not build any Farms (use Market to exchange for food.)
- Do not build any extra Roads – only what you need to connect.
- Do not build any Harbors (which also means there is no need to create large lakes with deep water)
- And even consider not building any Sheep Farms.
Instead, use the land to maximize:
- #1 One big or 2 Cattle Farms
- #2 Woodcutters
- #3 Quarries
If you have time keep on re-prospecting (even clearing a found resource) to try to find Gold or Coal. Use the leader Matthew (Surveyor) to increase your chances by 50%.
This should result in an estimated 3-10 gold earned per day.
The post Best way to earn Gold in Total War Battles: Kingdom appeared first on DolyGames.
]]>The post Unit Skills – Army Wiki – Total War Battles: Kingdom appeared first on DolyGames.
]]>ARTICLE CONTENT
- Unit Skills Basic Info
- 4 Barracks units: Swordsmen, Spearmen, Axeman and Macemen.
- 3 Stable units: Light Cavalry, Medium Cavalry and Knights Cavalry.
- 3 Knights’ Manor units: Longsword Knights, Greatsword Knights and Greataxe Knights.
- 4 Archery Range units: Longbow Archers, Javelin Throwers, Composite Bow Archers and Crossbowmen.
- 5 Viking Barracks units: Viking Hunters, Viking Swordsmen, Viking Archers, Viking Axemen and Viking Lords.
- 2 Militia units: Hunters and Levy.
UNIT SKILLS BASIC INFO
- Unit skills are very important – they can completely change the course of a battle.
- Mostly, each army unit can use their unit skill one time per battle, so make sure you use them at the correct time (e.g. Shield Wall versus a charging cavalry).
- They cannot be placed at the same time as Orders. So make sure to use one or the other with correct timing (unit skills place a small flag, while Orders place a large flag, so look at the flags to know when a skill is finished)
- Each of your units can choose to focus on one of 2 skills (one of 3 for the “new” Vikings). This is a permanent choice, so choose wisely (a skill choice can be changed, but it costs 25 gold)

BARRACKS UNITS
There are 4 Barracks units (from left to right on the screenshot): Swordsmen, Spearmen, Axeman and Macemen.
Note: there is no recruitment limit, i.e. players can have more than 1 of all of these units.

Swordsmen
Unit summary: The Swordsmen are an all-round unit effective against Spearmen and other lightly armored units.
Unit Skills
- Saviour: Swap position with a friendly unit in front during battle and add X points of defense for X seconds duration (starts with +15 defense and 25 second duration). This is the only skill in the game which allows saving of a unit in battle and, consequently, allows it to charge for the second time.
- Critical Strike: Ignores the enemy amour for X seconds (starts with a duration of 30 seconds)
Spearmen
Unit summary: The Spearmen exist mostly as a counter against enemy cavalry. They excel at that. Otherwise they do not fare well as other foot soldiers will beat them and ranged units will easily shoot them down.
Unit Skills
- Spear Wall: Protection from all charge and melee attacks (game changing skill against cavalry). Starts with a duration of 20 seconds (25 seconds on level 2).
- Rally: Replenishes the unit with X soldiers (starts with 8 soldiers; level 2 = 10 soldiers)
Axeman
Unit summary: The Axeman excel at cutting through heavy armor.
Axeman are a “Gold” unit, costing 45 Gold (also craftable, but very expensive – costing 250 crafting materials + a lot of silver per Master Craft)
Unit Skills
- Battle Cry: 50% chance to strike fear in the enemy you are engaged with in melee combat (“Fear” makes enemy soldiers run away from battle).
- Invictus: Become invulnerable to all melee and ranged damage (furthermore, this can be used to counter “Fear”). Starts with a 15 second duration (goes up to 20 and 25 for levels 2 and 3 respectively)
Macemen
Unit summary: The Macemen excel at cutting through light armor (leather) and chain mail (which are most of the non-knight units in the game).
Macemen are “Gold” unit, costing 135 Gold (also craftable, but very expensive – costing 250 crafting materials + a lot of silver per Master Craft)
Unit Skills
- Invictus: Become invulnerable to all melee and ranged damage (furthermore, this can be used to counter “Fear”). Starts with a 15 second duration (goes up to 20 and 25 for levels 2 and 3 respectively)
- Enrage: increases the unit’s attack by X for a duration of X seconds (starts with +20 attack for 10 seconds).
Barracks Unit Skills’ Screenshots


Note: this screenshot is from a level 2 Invictus:

STABLE UNITS
There are 3 Stable units (from left to right on the screenshot): Light Cavalry, Medium Cavalry and Knights Cavalry.

Light Cavalry
Unit summary: The Light Cavalry have a powerful attack / charge, but are only lightly armored making them vulnerable to ranged units (and melle units (especially Spearmen) after the charge is completed).

Unit Skills
- Rider Brotherhood: replenishes all cavalry units by 1 soldier
- Enrage: increases the unit’s attack by X for a duration of X seconds (starts with +20 attack for 10 seconds).
Medium Cavalry
Unit summary: The Medium Cavalry are a powerful mounted unit with good armor. They are an all-around powerful troop with little or no vulnerabilities second only to the Knights Cavalry (their Achilles Heel is the Shield Wall skill).
Note: can only own 1 of these units / only 1 can be recruited.

Unit Skills
- Rider Brotherhood: replenishes all cavalry units by 1 soldier
- Critical Strike: Ignores the enemy amour for X seconds (starts with 30 seconds)
Knights Cavalry
Unit summary: The Knights Cavalry are a powerful unit with heavy armor and long swords. They are an all-around powerful troop with little or no vulnerabilities (their Achilles Heel is the Shield Wall skill).
A “Gold” unit, costing 450 Gold (also craftable, but very expensive – costing 250 crafting materials + 20k+ silver per Master Craft)
Note: can only own 1 of these units / only 1 can be recruited.

Unit Skills
- Rider Brotherhood: replenishes all cavalry units by 1 soldier
- Invictus: Become invulnerable to all melee and ranged damage (furthermore, this can be used to counter “Fear”). Starts with a 15 second duration (goes up to 20 and 25 for levels 2 and 3 respectively)
Stable Unit Skills’ Screenshots
On level 2, Rider Brotherhood only adds the ability: “It also refreshes the ‘Move’ action”.

Note: this screenshot is from a level 2 Invictus:
KNIGHTS’ MANOR
There are 3 Knights’ Manor units (from left to right on the screenshot): Longsword Knights, Greatsword Knights and Greataxe Knights.
Note: can only own 1 of each these units / only 1 can be recruited.

Longsword Knights
Unit summary: The Longsword Knights are an all-round solid troop who are able to stand their ground against most units.

Unit Skills
- Saviour: Swap position with a friendly unit in front during battle and add X points of defense for X seconds duration (starts with +15 defense and 25 second duration). This is the only skill in the game which allows saving of a unit in battle and, consequently, allows it to charge for the second time.
- Invictus: Become invulnerable to all melee and ranged damage (furthermore, this can be used to counter “Fear”). Starts with a 15 second duration (goes up to 20 and 25 for levels 2 and 3 respectively)
Greatsword Knights
Unit summary: The Greatsword Knights do not have a shield, but, instead, carry a powerful great sword, which allows them to cut through most other footmen.
A “Gold” unit, costing 315 Gold (also craftable, but very expensive – costing 250 crafting materials + a lot of silver per Master Craft)

Unit Skills
- Saviour: Swap position with a friendly unit in front during battle and add X points of defense for X seconds duration (starts with +15 defense and 25 second duration). This is the only skill in the game which allows saving of a unit in battle and, consequently, allows it to charge for the second time.
- Invictus: Become invulnerable to all melee and ranged damage (furthermore, this can be used to counter “Fear”). Starts with a 15 second duration (goes up to 20 and 25 for levels 2 and 3 respectively)
Greataxe Knights
Unit summary: The Greataxe Knights are the perfect unit to deal with any heavily armored troops.
A “Gold” unit, costing 410 Gold (also craftable, but very expensive – costing 250 crafting materials + a lot of silver per Master Craft)

Unit Skills
- Battle Cry: 50% chance to strike fear in the enemy you are engaged with in melee combat (“Fear” makes enemy soldiers run away from battle).
- Saviour: Swap position with a friendly unit in front during battle and add X points of defense for X seconds duration (starts with +15 defense and 25 second duration). This is the only skill in the game which allows saving of a unit in battle and, consequently, allows it to charge for the second time.
Knights’ Manor Unit Skills’ Screenshots
Note: this screenshot is from a level 2 Invictus:
ARCHERY RANGE UNITS
There are 4 Archery Range units (from left to right on the screenshot): Longbow Archers, Javelin Throwers, Composite Bow Archers and Crossbowmen.
Note: for Composite Bow Archers and Crossbowmen players can only own 1 of each these units / only 1 can be recruited.

Longbow Archers
Unit summary: Longbow archers have the longest range and are able to pierce heavy armor, but they fire less often than most other archers.

Unit Skills
- Precision: Ignores enemy shields and avoids friendly fire for a duration of X seconds.
- Feather Brotherhood: Returns 2 archers to the unit that uses this skill and, also, to all other archer units. (On level 2 it also refreshes the “Fire” action, but does not increase the amount of soldiers returned).
Javelin Throwers
Unit summary: Javelin Throwers have a very short range and cannot reach the rear ranks, but they are perfect against heavily armored troops, especially if they do not have shields (shield limit their damage).
Javelin Throwers are a “Gold” unit, costing 90 Gold (also craftable, but very expensive – costing 250 crafting materials + a lot of silver per Master Craft)
Unit Skills
- Spear Wall: Protection from all charge and melee attacks (game changing skill against cavalry). Starts with a duration of 20 seconds (25 seconds on level 2).
- Wild Shot: Temporarily (starts with 30 seconds) removes the range restriction allowing to shoot further than usual.
Composite Bow Archers
Unit summary: The Composite Bow Archers do not have a long range like the Longbow Archers, but they fire a lot faster, which offsets their range shortfall.
Composite Bow Archers are a “Gold” unit, costing 270 Gold (also craftable, but very expensive – costing 250 crafting materials + a lot of silver per Master Craft)
Unit Skills
- Feather Brotherhood: Returns 2 archers to the unit that uses this skill and, also, to all other archer units. (On level 2 it also refreshes the “Fire” action, but does not increase the amount of soldiers returned).
- Flurry: Immediately fires 1 quick volley of arrows at the selected enemy target. Increases to 2 volleys of arrows at level 2.
Crossbowmen
Unit summary: The Crossbowmen are an interesting unit. They can only fire straight or to the sides, which limits their control over the battleground but they are strong and, unlike other archers, can fight well also in melee battles.
Crossbowmen are a “Gold” unit, costing 365 Gold (also craftable, but very expensive – costing 250 crafting materials + a lot of silver per Master Craft)
Unit Skills
- Precision: Ignores enemy shields and avoids friendly fire for a duration of X seconds.
- Critical Strike: Ignores the enemy amour for X seconds (starts with a duration of 30 seconds)
Archery Range Unit Skills’ Screenshots


VIKING BARRACKS UNITS
There are 5 Viking Barracks units (from left to right on the screenshot): Viking Hunters, Viking Swordsmen, Viking Archers, Viking Axemen and Viking Lords.
Note: except for Viking Hunters, players can only own 1 of each these units / only 1 can be recruited.

Viking Hunters
Unit summary: Viking Hunters are a hybrid of Javelin Throwers and Spearmen. They are heavy javelin throwers with a very short range and cannot reach the rear ranks, but they are perfect against heavily armored troops, especially if they do not have shields (shield limit their damage). Furthermore, they can serve as replacements for Spearmen against cavalry units.

Unit Skills
- Spear Wall: Protection from all charge and melee attacks (game changing skill against cavalry). Starts with a duration of 20 seconds (25 seconds on level 2).
- Wild Shot: Temporarily (starts with 30 seconds) removes the range restriction allowing to shoot further than usual.
- Enrage: increases the unit’s attack by X for a duration of X seconds (starts with +20 attack for 10 seconds).
Viking Swordsmen
Unit summary: The combat style of Viking Swordsmen is more offensive than defensive. Their shields and scale armor is effective against ranged units and compensates for their lack of defense against melee units.
Viking Swordsmen are a “Gold” unit, costing 150 Gold (also craftable, but very expensive – costing 250 crafting materials + a lot of silver per Master Craft)

Unit Skills
- Battle Cry: 50% chance to strike fear in the enemy you are engaged with in melee combat (“Fear” makes enemy soldiers run away from battle).
- Saviour: Swap position with a friendly unit in front during battle and add X points of defense for X seconds duration (starts with +15 defense and 25 second duration). This is the only skill in the game which allows saving of a unit in battle and, consequently, allows it to charge for the second time.
- Invictus: Become invulnerable to all melee and ranged damage (furthermore, this can be used to counter “Fear”). Starts with a 15 second duration (goes up to 20 and 25 for levels 2 and 3 respectively)
Viking Archers
Unit summary: Viking Archers lack precision, but can fully hold their own in melee battles due to their chain mail armor and long swords.
Viking Archers are a “Gold” unit, costing 350 Gold (also craftable, but very expensive – costing 250 crafting materials + a lot of silver per Master Craft)

Unit Skills
- Feather Brotherhood: Returns 2 archers to the unit that uses this skill and, also, to all other archer units. (On level 2 it also refreshes the “Fire” action, but does not increase the amount of soldiers returned).
- Critical Strike: Ignores the enemy amour for X seconds (starts with a duration of 30 seconds)
- Flurry: Immediately fires 1 quick volley of arrows at the selected enemy target. Increases to 2 volleys of arrows at level 2.
Viking Axemen
Unit summary: Viking Axemen wield great axes are are fully focused on offense able to cut down any enemy unit. However, they are less well armored and therefore vulnerable to ranged units.
Viking Axemen are a “Gold” unit, costing 420 Gold (also craftable, but very expensive – costing 250 crafting materials + a lot of silver per Master Craft)

Unit Skills
- Battle Cry: 50% chance to strike fear in the enemy you are engaged with in melee combat (“Fear” makes enemy soldiers run away from battle).
- Critical Strike: Ignores the enemy amour for X seconds (starts with a duration of 30 seconds)
- Enrage: increases the unit’s attack by X for a duration of X seconds (starts with +20 attack for 10 seconds).
Viking Lords
Unit summary: Viking Lords are elite warriors and while they lack in number they are ferocious and deadly with their axes able to split even strongest of armors.
Viking Lords are a “Gold” unit, costing 580 Gold (also craftable, but very expensive – costing 250 crafting materials + a lot of silver per Master Craft)

Unit Skills
- Rally: Replenishes the unit with X soldiers (starts with 8 soldiers; level 2 = 10 soldiers)
- Battle Cry: 50% chance to strike fear in the enemy you are engaged with in melee combat (“Fear” makes enemy soldiers run away from battle).
- Saviour: Swap position with a friendly unit in front during battle and add X points of defense for X seconds duration (starts with +15 defense and 25 second duration). This is the only skill in the game which allows saving of a unit in battle and, consequently, allows it to charge for the second time.
MILITIA UNITS
Militia (Hunters and Levy) are starter units which all players have, but there is no dedicated building for recruiting these. All players get 2 Hunters and 2 Levy units. In general they should be replaced with “proper” troops as soon as possible as they are rather weak. They also cannot be disbanded like “normal” units.
Hunters
Unit Skills
- Feather Brotherhood: Returns 2 archers to the unit that uses this skill and, also, to all other archer units. (On level 2 it also refreshes the “Fire” action, but does not increase the amount of soldiers returned).
- Flurry: Immediately fires 1 quick volley of arrows at the selected enemy target. Increases to 2 volleys of arrows at level 2.
Here is the screenshot of my fully upgraded Hunters:

Levy
Unit Skills
- Rally: Replenishes the unit with X soldiers (starts with 8 soldiers; level 2 = 10 soldiers)
- Enrage: increases the unit’s attack by X for a duration of X seconds (starts with +20 attack for 10 seconds).
Here is the screenshot of my somewhat upgraded Levy soldiers:

Summary Bullets
What against what:
- Use axes against heavy armor (the non-shield version is more powerful but is more vulnerable to ranged attacks).
- Use swords/maces against light armor or medium armor (the non-shield version is more powerful but is more vulnerable to ranged attacks).
- Use cavalry against any infantry or ranged units (beware of any spear holding units).
- Use javelins/crossbows against heavy armor (careful with short range or shooting direction respectively).
- Use archers against any units without shields.
Armors:
In general all:
- Knights wear heavy armor.
- Other foot soldiers wear chain mail armor.
- Archers wear light armor.
The post Unit Skills – Army Wiki – Total War Battles: Kingdom appeared first on DolyGames.
]]>The post Analysis: Mistakes by CREATIVE ASSEMBLY – TWBK Cooldowns appeared first on DolyGames.
]]>Firstly, I want to highlight that I like both Creative Assembly and I have enjoyed playing Total War Battles: Kingdom. The purpose of this post is not to bash mindlessly but to professionally explain the mistakes from the point of view of both an professional/analyst and a gamer and help further by proposing solutions to improve the game(s).

So how did Creative Assembly go wrong?
Total War Battles: Kingdom has gotten some very negative reviews by players and even majorly angered some who went on to rant negatively about the game which not only damaged the performance of TWBK but I firmly believe also damaged the brand image of Creative Assembly.
Here is a chart showing Steam player reviews where it is very clear/visible to see the amount of the angry/negative reviews by players. Of course there are also many positive reviews but if we compare this product to other games by Creative Assembly it is a clear contrast where other “proper” Total War games have significantly positive reviews.

Let’s get started
I have prepared series of screenshots illustrating Creative Assembly’s mistakes in cooldowns / game design, so let’s jump to them 1 by 1 and I will also add further explanations along the road.
Waiting for Workers
I will start with Houses / Workers, because this is one of the first things the player / gamer gets to see, which made a lot of players very angry.
Below you see a screenshot from the “House” (there are 3 types of houses, this is the “middle” one). The player is immediately confronted with a pretty big cooldown of multiple hours (5+ hours on this screenshot) and, pretty much, right from the beginning of the game.
You see, the player will build something like a Blacksmith to generate income, but in order for the Blacksmith to work it needs workers, so the player builds one of the “House” types to get those workers as expected by the game and “BANG!” s/he is in for the shock of waiting 5+ hours just to get started playing!
In this day and age where people have no patience and many games have few minute cooldowns + free speedups under 5 minutes.
So now you can’t use the Blacksmith you just built and you can do pretty much nothing else with your city until you start getting those workers. And just you wait for what happens when you actually do get them 🙂

Trying to get some Food
Next, you want some barrels of food, so you build a Farm to grow wheat. What happens then:
- The player has to wait for the farm to sow seeds (new waiting time/cooldown per each hex around the farm)
- Then the big shock: the player has to wait up to 11 hours for the wheat to grow.
- The screenshot below showing 10.5 hours on the Wheat Field (Autumn season)
Note (side point on Creative Assembly’s monetization failure): an additional note, there is no way to speedup or eliminate this cooldown, neither in-game nor with real money (Gold). This is one of many shortcomings in monetization which I will not go in-depth on in this article as it would need it’s own dedicated report/analysis explaining the multitudes of monetization and player retention mistakes.

Patience for Wood
Once you chop down the trees you will need to plant new trees (done by the Woodcutter although the game really fails to explain this and furthermore never talks about the planting range),
The player is then confronted with pretty massive cooldowns for the trees to grow. The screenshot below showing 2 examples of 14+ hours and 2 days.
And bear in mind that trees will generate a few dozen units of wood while the player needs thousands for their first building upgrades.

Not-so-welcome to Crafting cooldowns and costs
When crafting is available to the player, s/he may want to bang the head on the wall or tear out hair in frustration. You have multiple insane game design elements in this alone:
- Getting the crafting elements via Sheep or Cattle –> massive cooldowns just to get 1 or few pieces; here screenshots showing 18+ hours grazing / breeding and 9+ hours growing wool
- And you will need a large amount just to get the crafting started… (by the way, none of this is explained in the game!)
- When you do finally manage to start the craft you are shocked by the game telling you that not only you need to wait 12-24 hours to craft your item, but you have to do that in 5+ stages, i.e. repeat 12-24 hours cooldown/waiting 5+ times!


Here you see the crafting window:
- Each Craft attempt takes 12 hours and generates 1 bar or half if failed or rare 1+ if lucky/critical.

Solutions / Recommendations for Creative Assembly
Now that I have outlined the problem with cooldowns clearly let’s talk about how Creative Assembly could have done this better or how they could correct it.
Firstly, there are 2 paths to choose from:
- The difficult fix: which would involve a re-design / re-think of game systems allowing quicker interactions and/or adjusting difficulty.
- The quicker & dirty fix: which maintains the current difficulty level while addressing the problems which is the one I recommend to do either as the complete fix or as Step 1 before the above path can be created/discussed/agreed, which can take a longer time.
Let’s take houses / workers / Blacksmith for example:
I’ll simplify: let’s assume Creative Assembly, in TWBK, wants to give 1 worker per 5 hours (the Blacksmith / Tavern requiring 5 workers before they start working). There are 2 fixes that can easily be implemented here:
- The problem created by this condition is that you cannot have less than 1 worker as you cannot cut a person in half. So a smarter / better way is to increase the quantities and say that the Blacksmith has space for up to 50 workers (notice here I am changing 2 things: both the amount of workers and the condition which we will use in the 2nd fix below). Now that we changed 5 workers to 50 we can start giving the player 50 / 5 = 10 workers per hour or 1 worker per 6 minutes! Now that’s a lot more acceptable than shocking players with a 5 hour cooldown!
- Does a bar or restaurant stop working completely if 1 out of 5 of their workers has to leave or gets sick? No, of course not. There is absolutely no reason at all to force the player to fill up all of the workers. Instead, what is smarter / better is to adjust production or income based on the workers assigned by the player. So instead of generating 10 silver by 5 workers we take the production level as a maximum and allow the player to earn less than the maximum depending on the assigned workers. We allow the player to immediately assign the 1 worker s/he received per 6 minutes remembering that the maximum is 50 workers. This means we can give the player a reward already for doing this! This will be 1 / 50 x [maximum reward amount] instead of having to wait many hours for the maximum. Therefore the silver values should also be adjusted by multiplying all values by 10 or 100 for example. So 100 silver or 1000 silver instead of 10. This allows us to divide by 50 and get 2 or 20 silver which we can reward to the player!
This solution would be very easy to implement for Creative Assembly and would change the visible waiting times from many hours to minutes removing any such negative surprises / shocks as players would not have any issue accepting waiting times of 5-6 minutes versus 5-6 hours. Moreover this preserves the current difficulty level.
Similar logic can be applied onto other elements in Total War Battles: Kingdom.
Wheat collection: allow a faster collection of smaller amounts while maintaining the maximum ceiling so if the player is not active s/he can collect the full reward when returned, while the active players can be busy collecting their food barrels.
Herds & Crafting: these need more attention, but the same solution/logic can be applied:
- There is absolutely no reason to force the player to wait 10-20 hours for a full herd size. The maximum herd size can be kept the same, e.g. 12 for sheep, but it is absolutely better to allow the player to collect production per animal, not being forced to wait for all 12. Keeping the same difficulty, this would mean 1/12th of the reward, but would keep active players engaged and keep giving out rewards to players at an acceptable cooldown.
- Similarly the 5 stages of 12 hour crafting must go (far away into the depths where no creature can reach). Crafting can be made so much more interesting in TWBK than it currently is. I could devote an entire report just to fix the crafting in the game, but at the very minimum, the cooldown issue can be fixed via 2 avenues:
- Open +1 equipment: There is no reason to have +2, +4, +6 only other than it being pleasant for the people who designed it. Players should be able to craft the most basic items cheaply and later be allows to further improve them or to craft new items trying to get a better bonus.
- Stages must go: There should be either a continuous time-based crafting process (only interrupted by lack of workers) or a time-independent system based on a number of hammer strikes or craft attempts. I strongly recommend the latter with no or minimal cooldown periods as it allows players to get basic items within acceptable time as long as they have sufficient resources to craft the item. Higher level items can require a tougher approach but by this time the players would not have left the game in anger.
Conclusions / Final words
- I highlight again that in this analysis blog post I have focused only on the mistakes done by Creative Assembly related to cooldowns. There are A LOT more things which can be fixed/improved in TWBK, both in game design / game systems / balance, as well as player retention and monetization. Each of which have a lot of issues / mistakes in this game.
- There is also a lot of good work done by Creative Assembly in TWBK, but I would limit that to the art/graphics, music/sounds, pleasant atmosphere rather than game design excellence.
- The multi-hour / multi-day cooldowns have got to go away!
- Everything is fixable in TWBK, because I find the game to be very aesthetically pleasant. I can feel a lot of love and sweat has gone into making this a very beautiful game (that part Creative Assembly has done well) and I would hate that being lost due to poor game design / poor game systems. But still a decision must be made since the game was launched with so many errors and already angered players and generated a lot of negative publicity. This decision is: (1) either to try to fix the game, or, (2) release a new game with a new name, copy/pasting all the good things and fixing all the bad things.
- If I was the business owner, I would do both, choosing multitudes of easy fixes for TWBK while giving a new fantasy or sci-fi world/atmosphere to the new game while keeping the spine to minimize costs. Otherwise, if I was forced by Creative Assembly to choose one (not having access to TWBK player statistics), I would make a new game as one has to consider that it will cost a lot of money to undo the already-generated negative publicity/content on TWBK.
The post Analysis: Mistakes by CREATIVE ASSEMBLY – TWBK Cooldowns appeared first on DolyGames.
]]>